
Usage
Install add-on in your favorite browser! (by the Users)
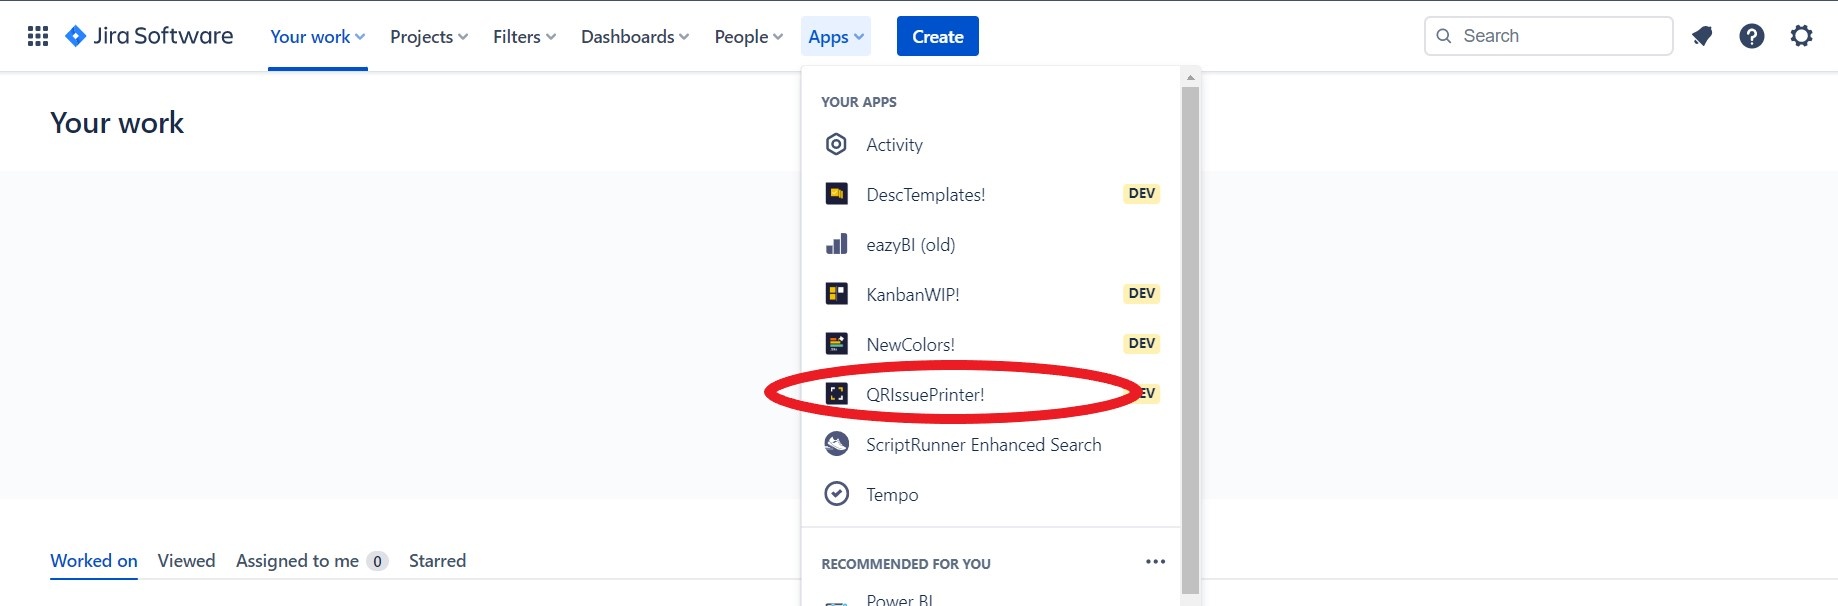
Go to Apps → QRIssuePrinter! and install the add-on in your favorite browser
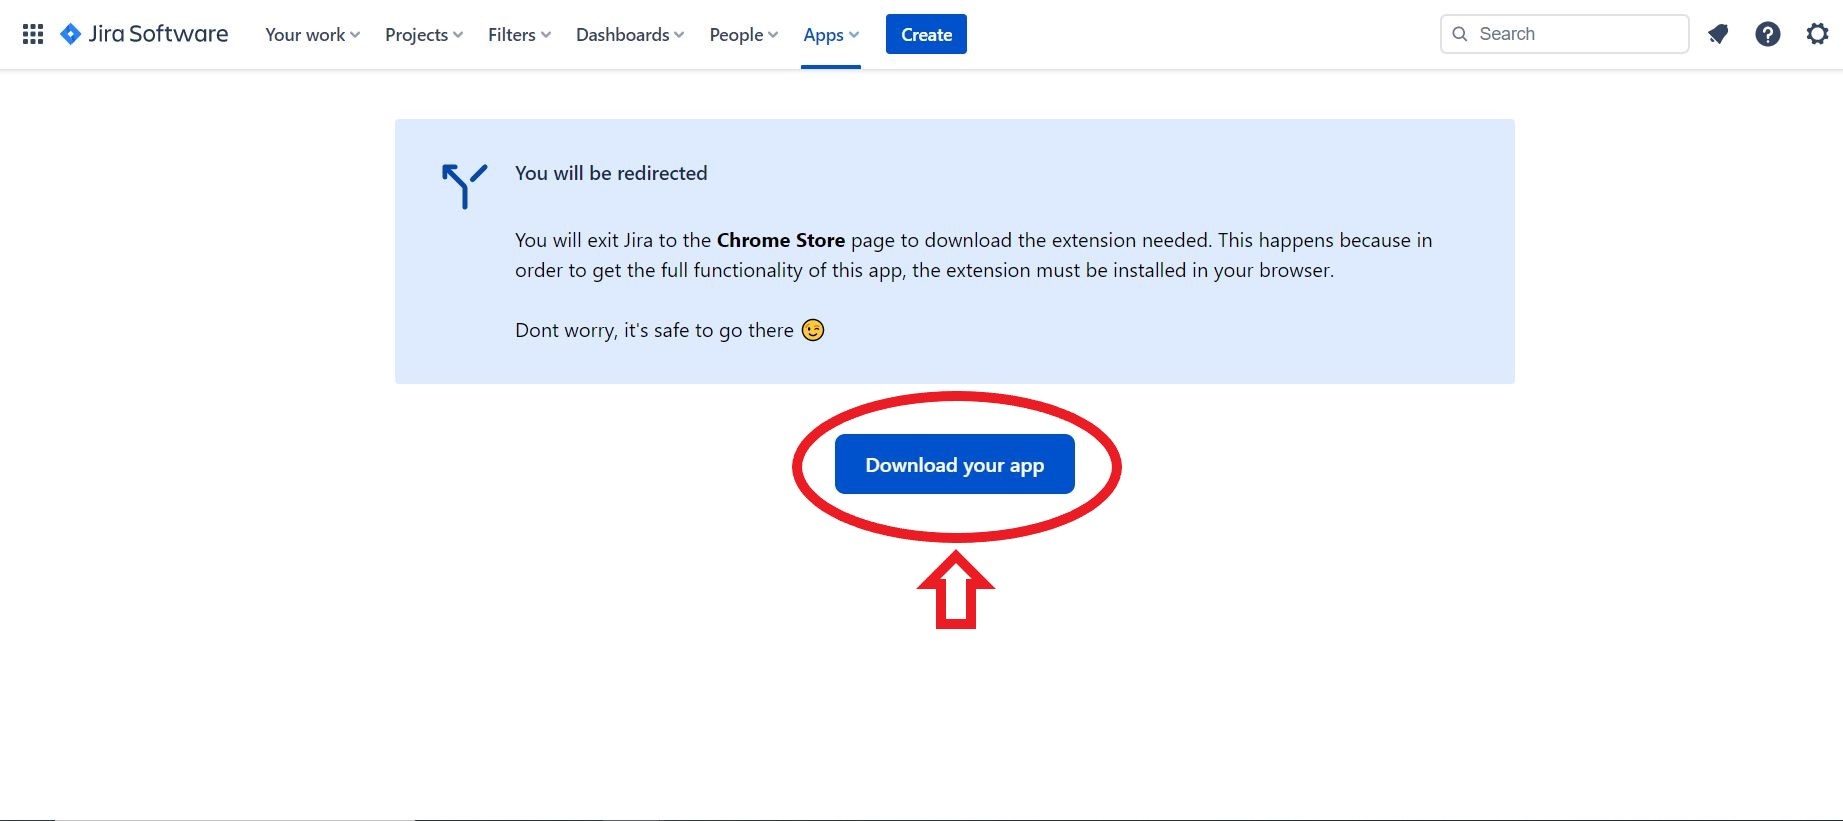
A page will open where you must click the "Download your app" button
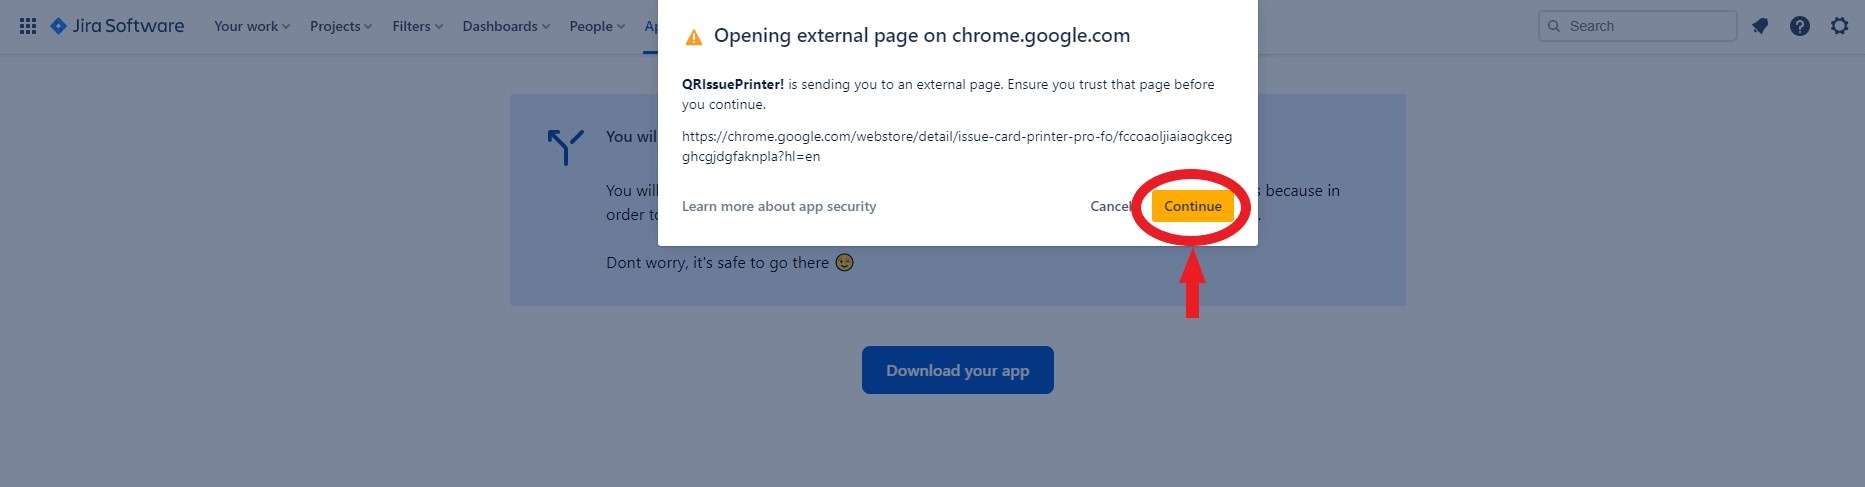
A new window will appear to warn that it is an external link. Click on continue
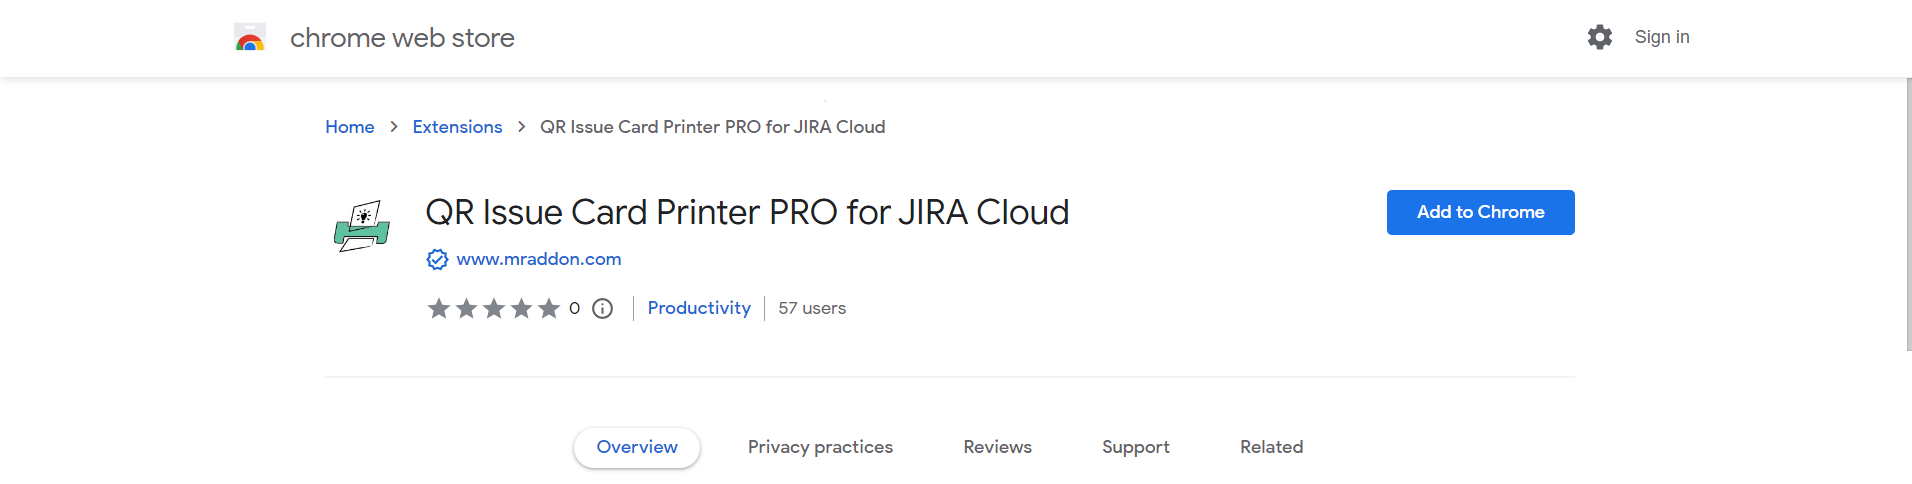
Directs you to the browser's web store. Add the plugin to the browser
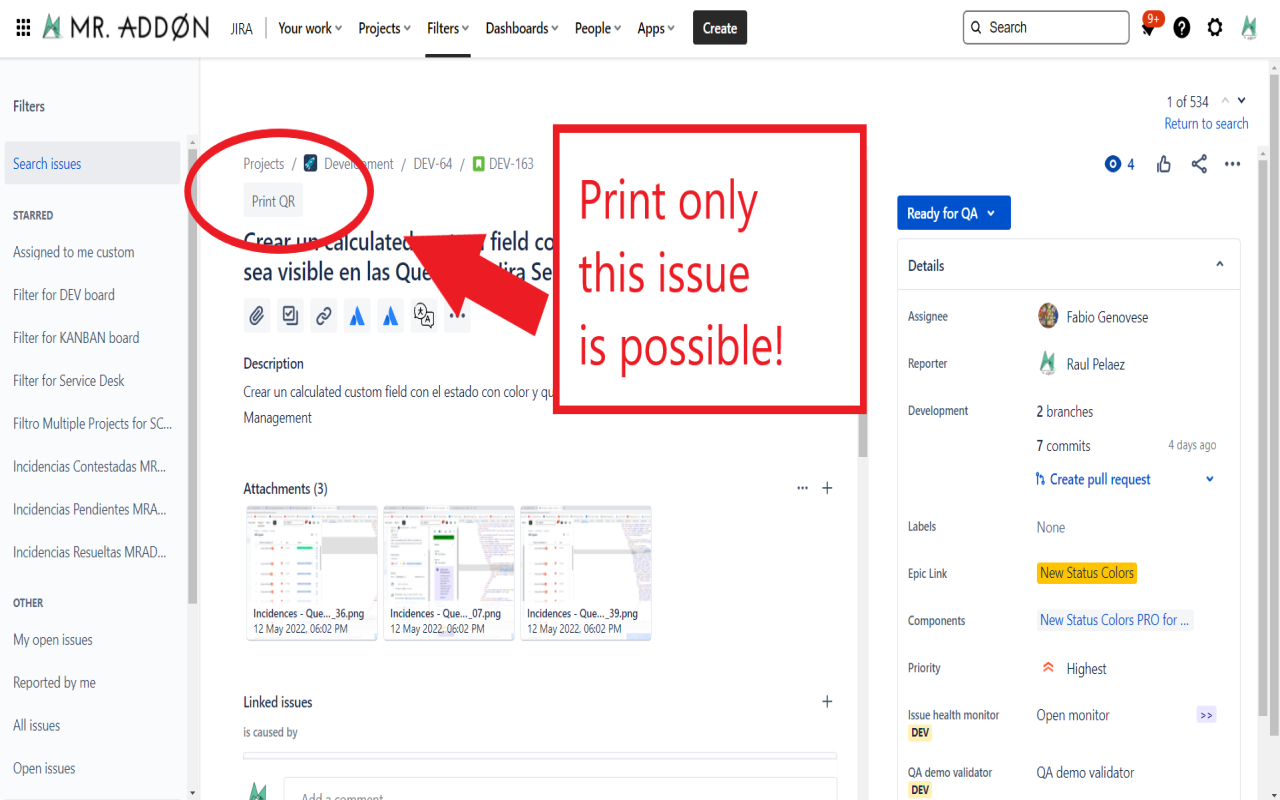
That’s all! Now take a look in your Issues, Filters and Kanban/SCRUM boards and backlogs and you will see a new button “Print QR”
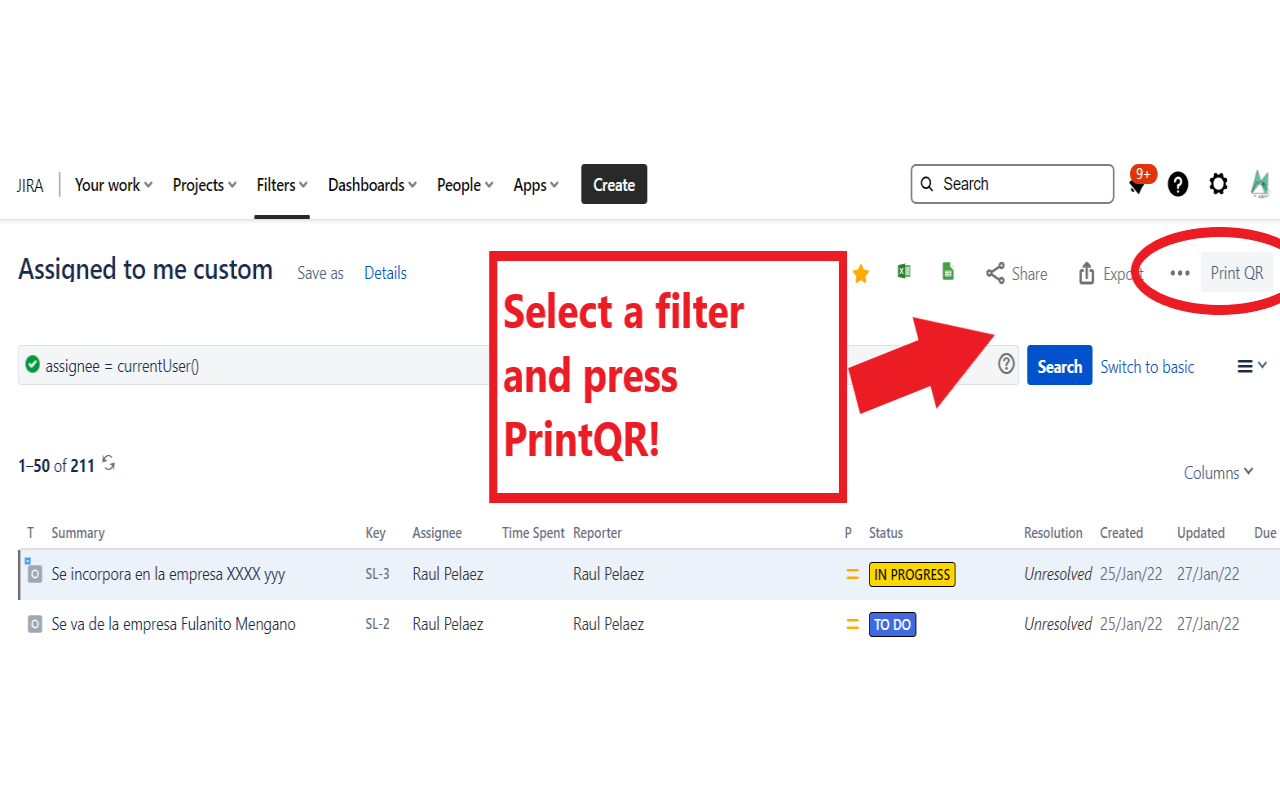
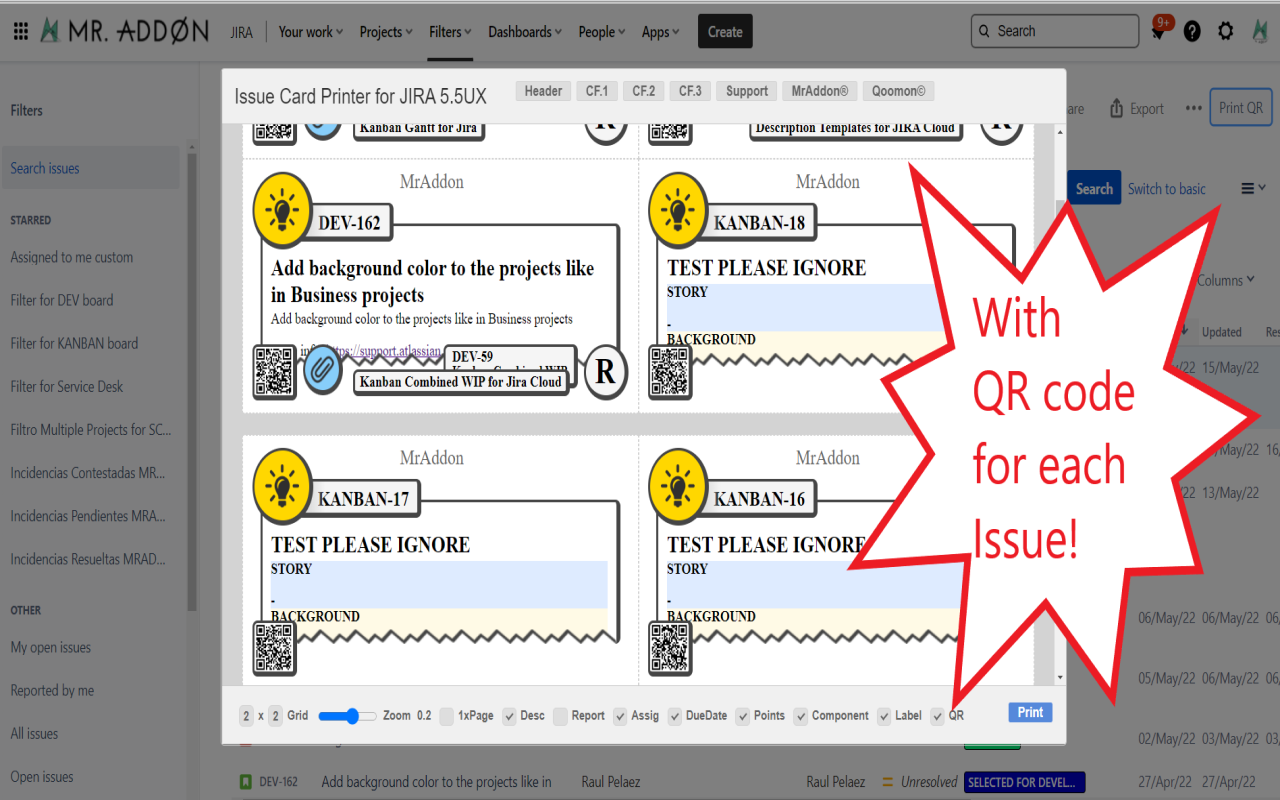
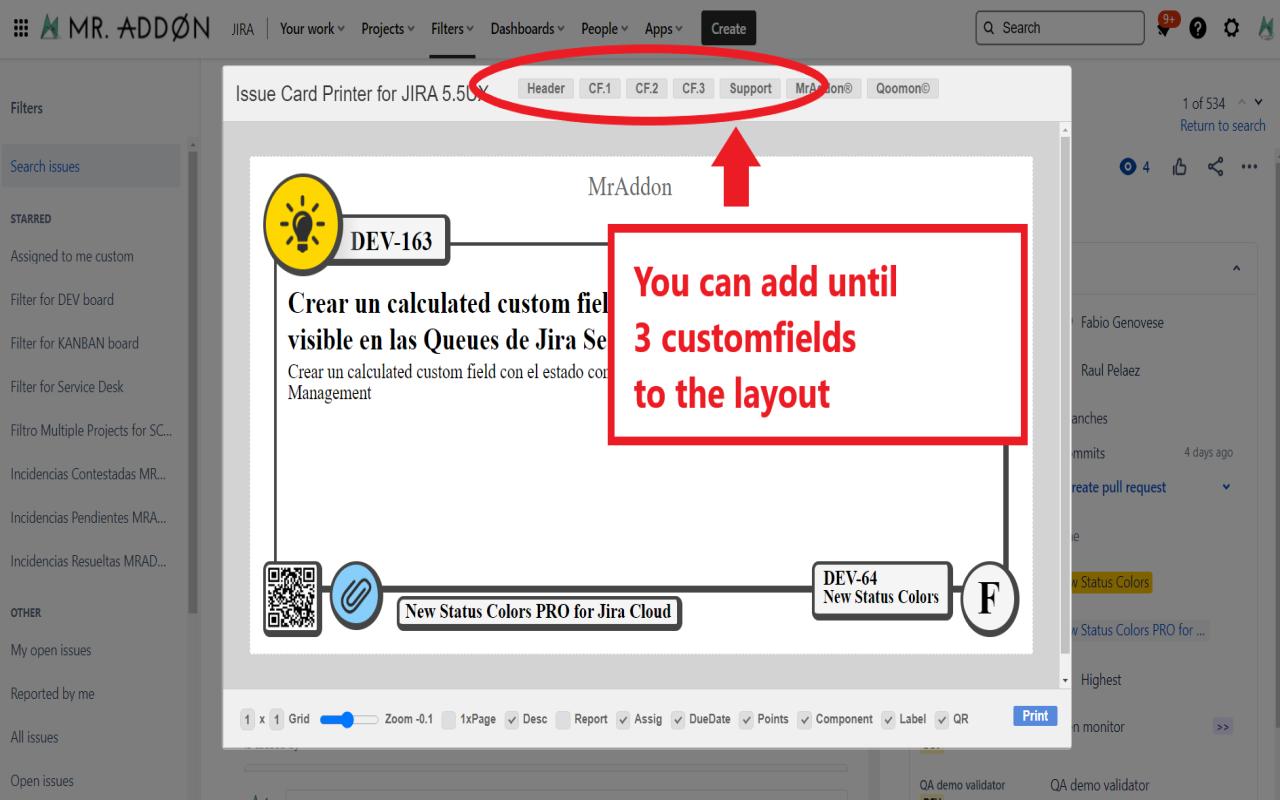
After press the “Print QR” button you will see a beatiful cards ready to print in one click!!
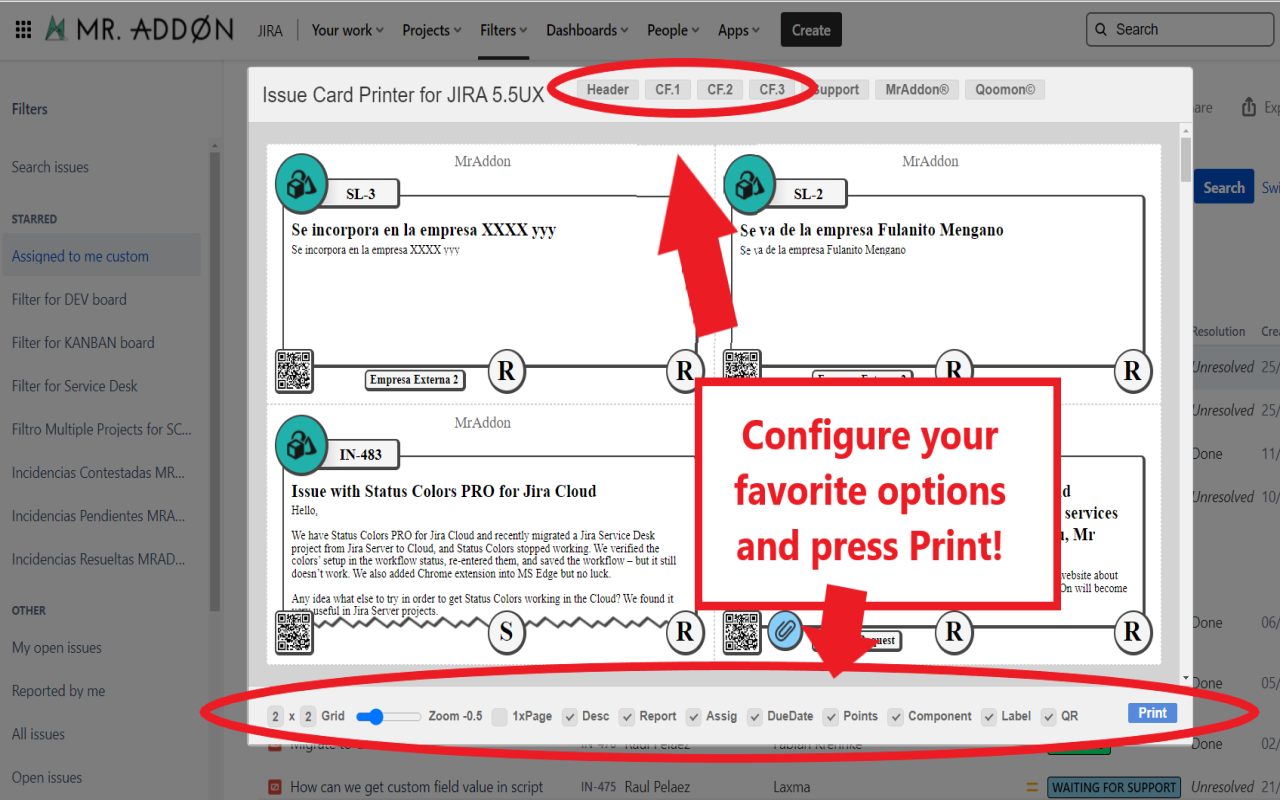
Now we can configure show/hide the system fields of Jira, we have a Zoom control and grid control, also of course, the QR code.
In the header part we can see some buttons:
-
Header: to change the title of the cards
-
CF1, CF2, CF3: To see some customfield value ( usually single line text field, numeric field, or date field)
-
Once configured, push “Print” button!
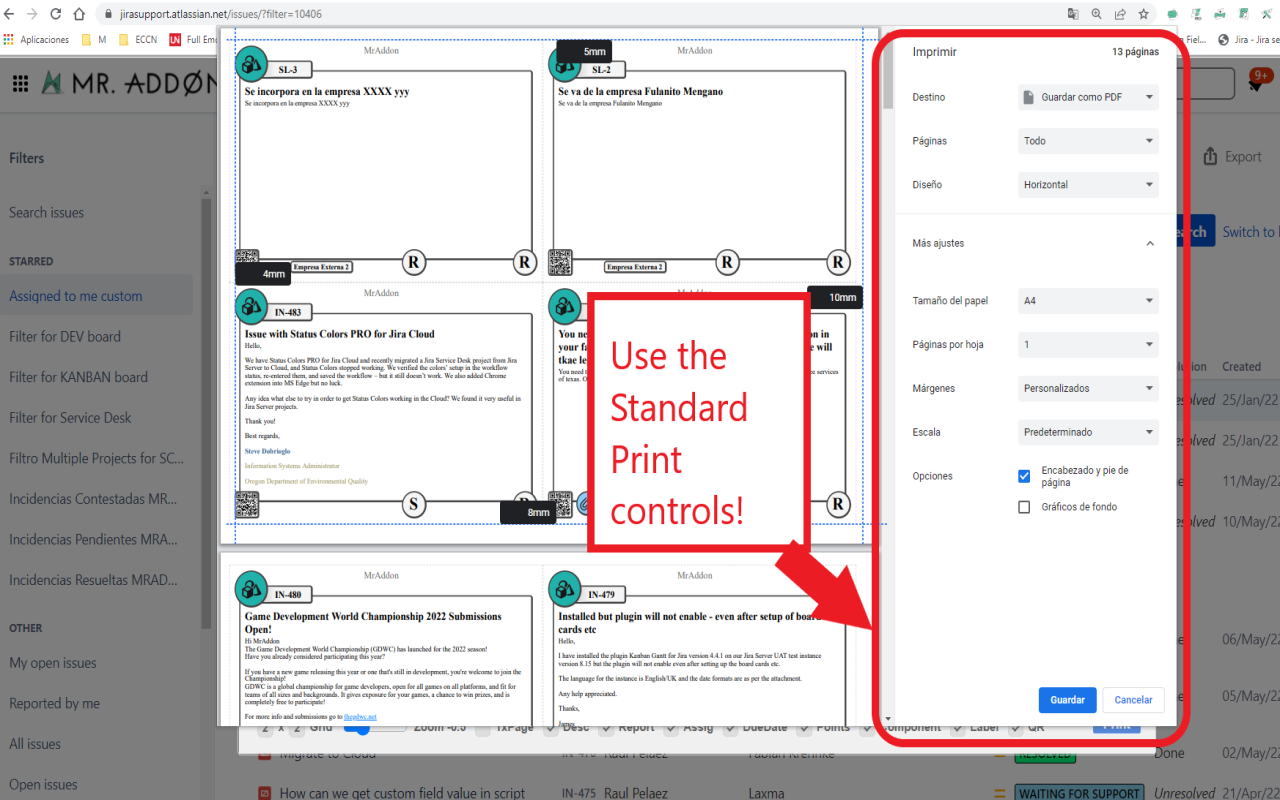
Just configure the final part, page margins and Save it as PDF or just print in your usual printer!
If you need to print only one issue, it’s possible of course! Search the “Print QR” button and that’s all!
Troubleshooting (Display Customfields in the layout)

If you need to display in the cards values of customfields instead of the system fields, it’s possible!
You need to ask by the ID of the customfield to your Jira Admin.
And follow those pictures to configure it:
-
Click in CF1 or CF2 or CF3 buttons and add the “customfield_xxxx” value where “xxxx” is the ID of the customfield
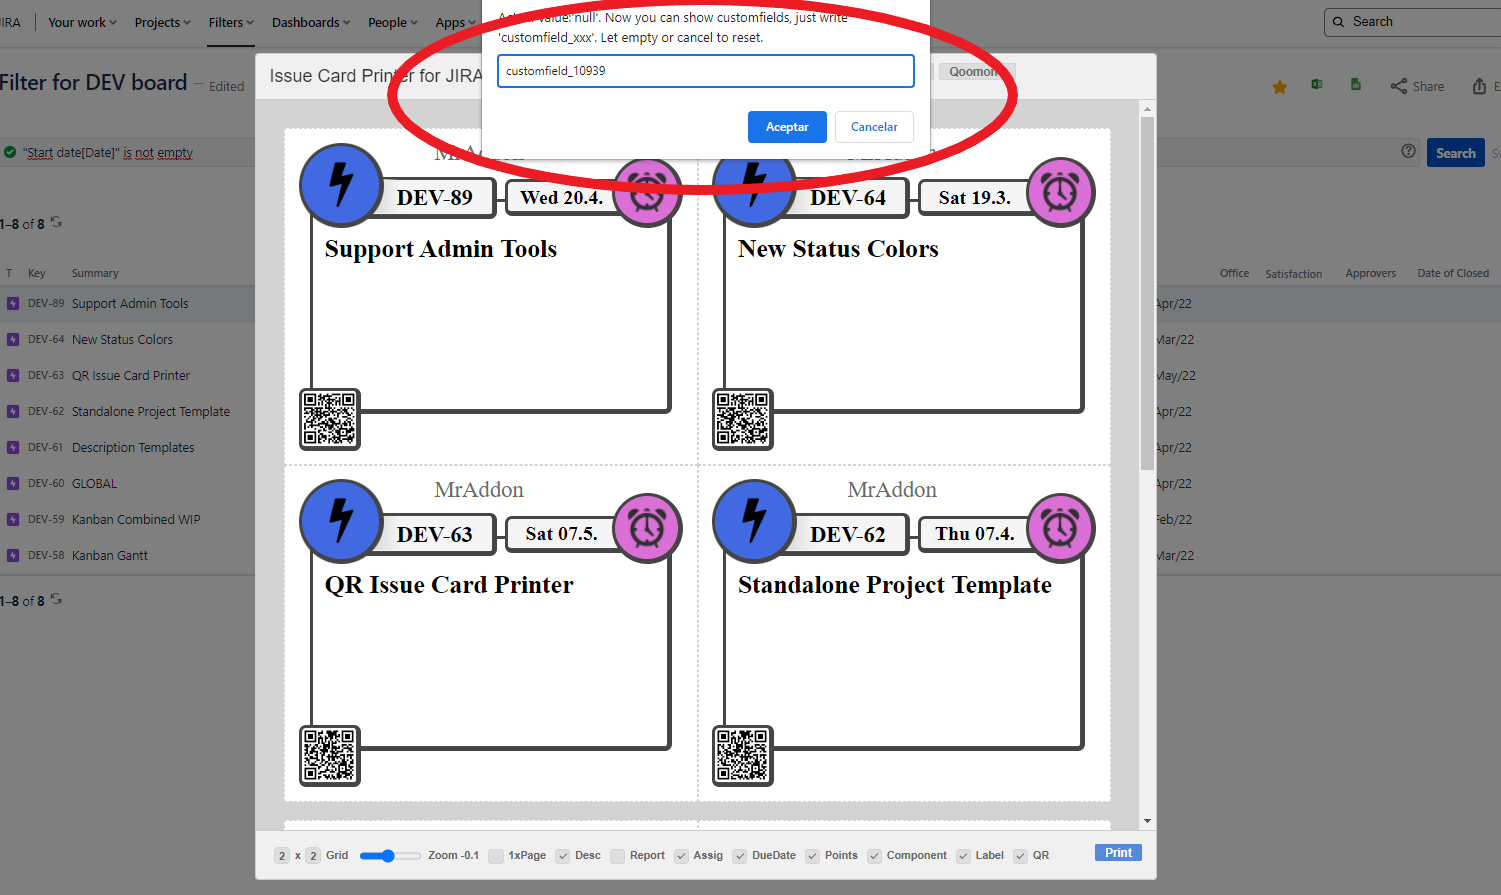

Header, CF1, CF2, CF3 and the hide/show buttons are saved in cookies in your favorite browser in order to re-use the configuration next time.
That’s all!